Squiggles' Terrafirmacraft Playthrough!
-
mysteryROOSTER

- gay
- Posts: 557
- Joined: Sun Nov 20, 2022 11:30 am
- Location: m rooster
- Contact:
Re: Squiggles' Terrafirmacraft Playthrough!
Appreciate the ongoing high-quality Terrafirmaposting. I hope your house build goes well, I've never tried to gather building resources with such an in-depth mod like this

-
SkieSquiggles
- They/It

- Posts: 1754
- Joined: Sat Nov 19, 2022 7:29 pm
- Contact:
Re: Squiggles' Terrafirmacraft Playthrough!
I'm glad you enjoy my posts! The build hasn't started yet but I have high hopes. It's a little different gathering materials when the crafting is this intensive and manual, but it really isn't that different to resource gathering in vanilla. Thanks for reading!mysteryROOSTER wrote: ↑Mon Aug 21, 2023 10:25 am Appreciate the ongoing high-quality Terrafirmaposting. I hope your house build goes well, I've never tried to gather building resources with such an in-depth mod like this
 Signature Under Construction
(until I think of a better one)
Signature Under Construction
(until I think of a better one)-
SkieSquiggles
- They/It
- Posts: 1754
- Joined: Sat Nov 19, 2022 7:29 pm
- Contact:
Re: Squiggles' Terrafirmacraft Playthrough!
Look forward to this coming back btw
Signature Under Construction
(until I think of a better one)-
SkieSquiggles
- They/It
- Posts: 1754
- Joined: Sat Nov 19, 2022 7:29 pm
- Contact:
Re: Squiggles' Terrafirmacraft Playthrough!
After a long wait our Terrafirmacraft let's-play returns! Before we get into it, I did add some more mods, to nobody's surprise. These mods are: TFC Ambiential, Spyglass Improvements, and Chalk plus a chalk compatibility recipe datapack. I tried using a compatibility mod for Macaw's Furniture for decoration purposes but it wasn't functional enough to keep.
But enough preamble, now is the time for

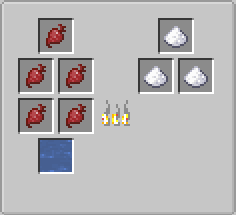
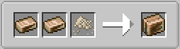
We jump back in on February 5th in the year 1001, ready to build my house. I am immediately distracted by my desire to make a wool bed. The sheep and goats are fully familiarized at this point, but I still need a pair of shears to harvest the wool. This poses a bit of difficulty for me, because I need to get into basic smithing to make shears, which is a thing I would rather not get into quite yet. With this in mind, I promptly become distracted by a different thing entirely: I noticed that my beets from last year were getting close to rotting, so in order to not waste them I boiled them down into sugar. The process is the same as making a soup, but rather than using fresh water as a base, you need salt water.
water and salt in a barrel makes salt water

beets into sugar recipe
After finishing up with the beets I finally started on the actual house build. I got through almost one layer of bricks before realizing I was going to need a lot more of them. While placing the floor down I realized I was also short on blackwood. During all this I was making frequent trips to collect firewood to fuel my brick needs, during these trips I would find and take home strawberry bushes pretty frequently, and eventually I crafted up a drying bed to preserve the fruits I was getting. The single pumpkin I planted last fall was putting in work, and I had a lot more fresh pumpkin chunks than I knew what to do with really.
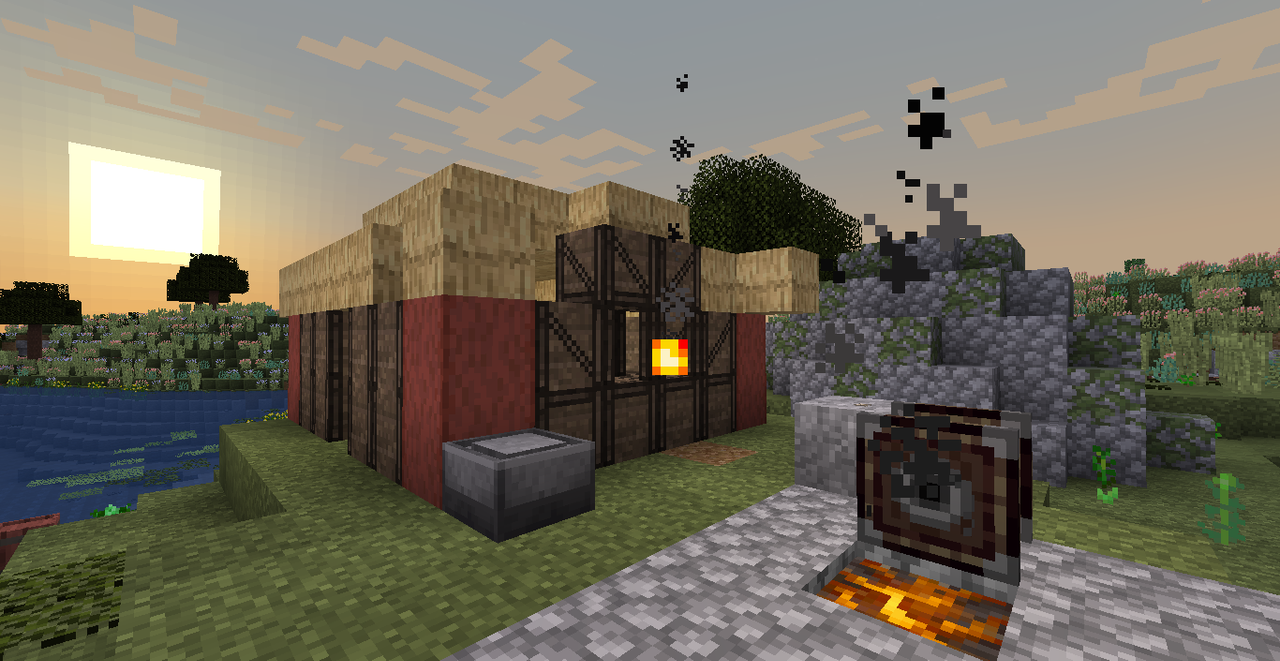
After collecting more bricks and finishing the floor I decided it was time to build my oven. The oven is a freeform-ish multiblock from the FirmaLife addon, it allows for things like baking bread, pies, and pizzas. It's fairly fuel efficient and it's honestly one of my favorite parts of the addon, though those facts are unrelated. Making the oven is easy enough, each one requires a few things: at least one top oven, at least one bottom oven, a chimney, and insulation blocks. The oven is made by placing a top oven on top of a bottom oven, with chimneys placed behind them in a vertical line (like a chimney). The top and bottom oven need all sides except for the front and top to be covered by an insulation block, usually bricks. You can have more than one oven stack in a row, and the oven I built has three spaces for cooking.
my freshly placed oven, curing
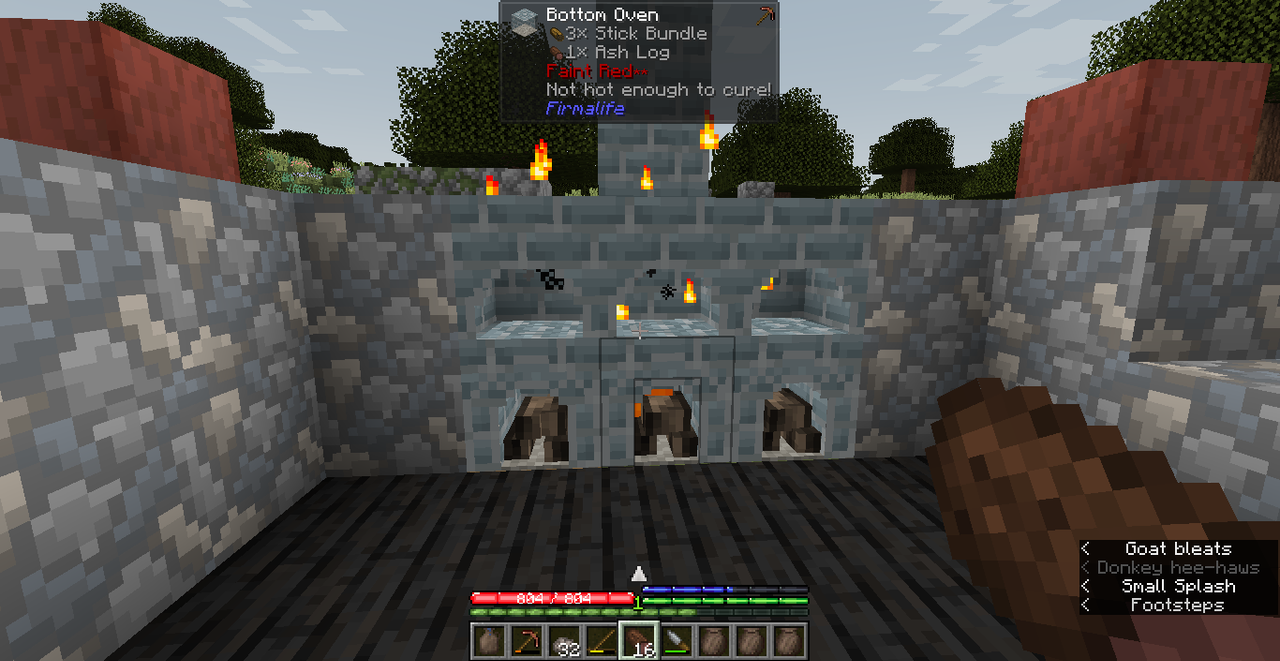
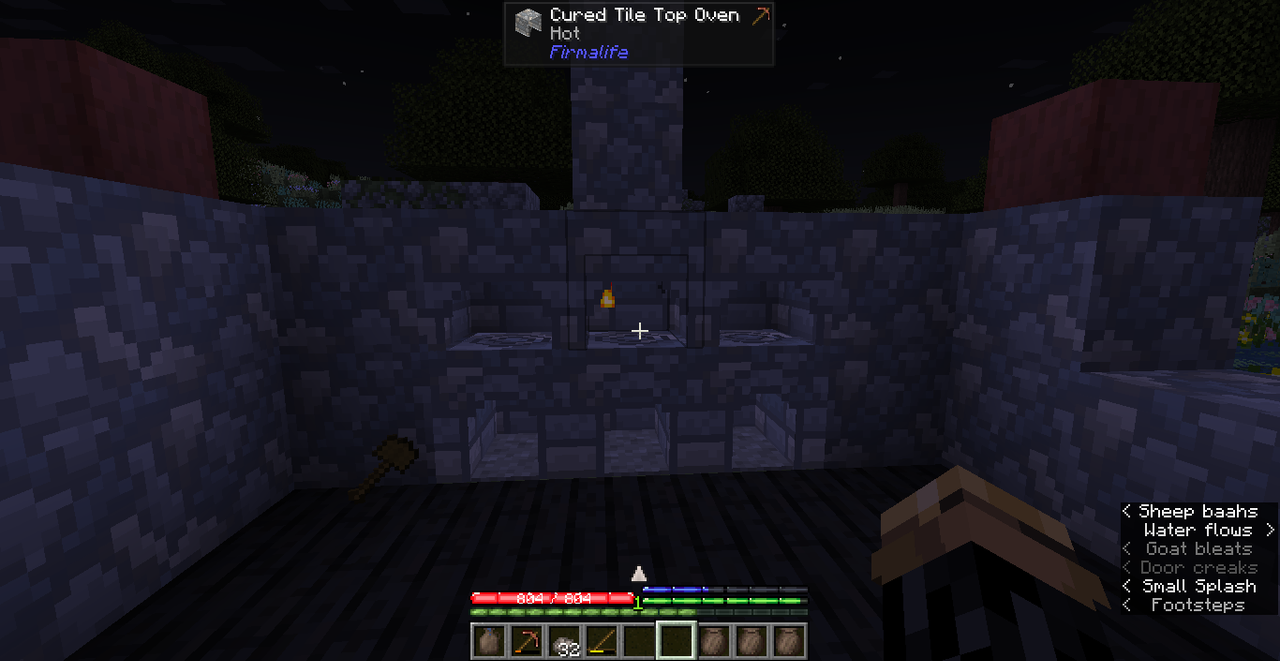
Once you've placed your uncured oven parts in the world, you will have to light the oven and keep it above 600° for 80 seconds, which is actually pretty easy. This cures the oven block and any oven parts connected to it, including chimneys. Your oven is now ready to use!
my oven, cured. sorry for the nighttime picture, I'm a fool
After completing these steps for my own oven, I realized I would have to make a charcoal forge to craft the shears I needed. Then, I realized I would need a bellows to actually use the charcoal forge effectively. So I spent a lot of time building those things. But before you can make a charcoal forge you need charcoal, which is itself made by placing a bunch of logs in a pit and lighting it on fire.
process of making the tiniest charcoal pit possible
The bellows are made with two pieces of leather, which I was a little short on so I had to do all the work that entails while waiting on the charcoal, and my ever growing brick empire. The charcoal sits on the ground in layers like snow does, and all you need to make a charcoal forge is one less than a full block of layers. You light that on fire and you've got yourself a charcoal forge.
a finished forge
I made the mistake of placing my forge too close to my mud-and-sticks abode, and it caught on fire. I was able to put the fire out before anything important was destroyed, but I did spend a little time repairing the damage. It was clear to me at this point that I was going to need to finish my house quickly, before something terrible and funny happened to my current one.
***
Well dear freakboards reader, we have now come to the time where I have to explain how crafting shears works. All in all it's fairly simple: In TFC shears are crafted by welding a pair of knife blades together, this is done by heating two knife blades up in a coal forge until the tooltip says "can weld" and then very quickly transferring them to an anvil with flux in it. Then you shift-right-click on the top of the anvil with your hammer, and they're welded.
the process of making shears from knife blades

You also need to occasionally weld ingots together into double ingots (for making sheets), and sheets into double sheets. Some armor pieces also require welding some parts together for the final craft. Once we get pretty far into the Create stuff I'll actually be able to use machinery to make the welding process much easier.
the welding recipe for a double ingot
the welding recipe for a steel helmet

This is, at the end of the day, not an overly complex process. Unfortunately, at many times I have the attention span of a salmon, which meant this process took me over an hour in between a dozen other little things I was trying to do at the same time. I accidentally fully lost an entire ingot of copper because I melted it in the forge, I failed repeatedly to get the knives hot enough to get them on the anvil and weld them before they became too cold, it was miserable. I was in shear hell. I truly don't know how I fucked it up as bad as I did but it was awful, and though I did eventually craft the shears I was covered in a mixture of blood, forge induced sweat, and tears by the time it was done.
***
After my shears adventure, I was finally able to fully focus on the building. I finished the ground floor of my house, only to realize I actually wanted to change my original design completely, and instead I wanted to do something that would require a whole lot more bricks. This meant more clay, and so I had to go back out into the northern clay reaches. In preparation for this clay gathering trip I decided to craft a compass. I don't remember my reasoning for this, but my best guess is that I wanted to rely less on the mapping mod and rely more on landmarks and orientation, which I recognize is nuts but to be fair I am playing Terrafirmacraft. Once I had the compass though I realize it was a re-skinned vanilla compass, and pointed towards spawn rather than north. To remedy this, I installed the northern compass mod.
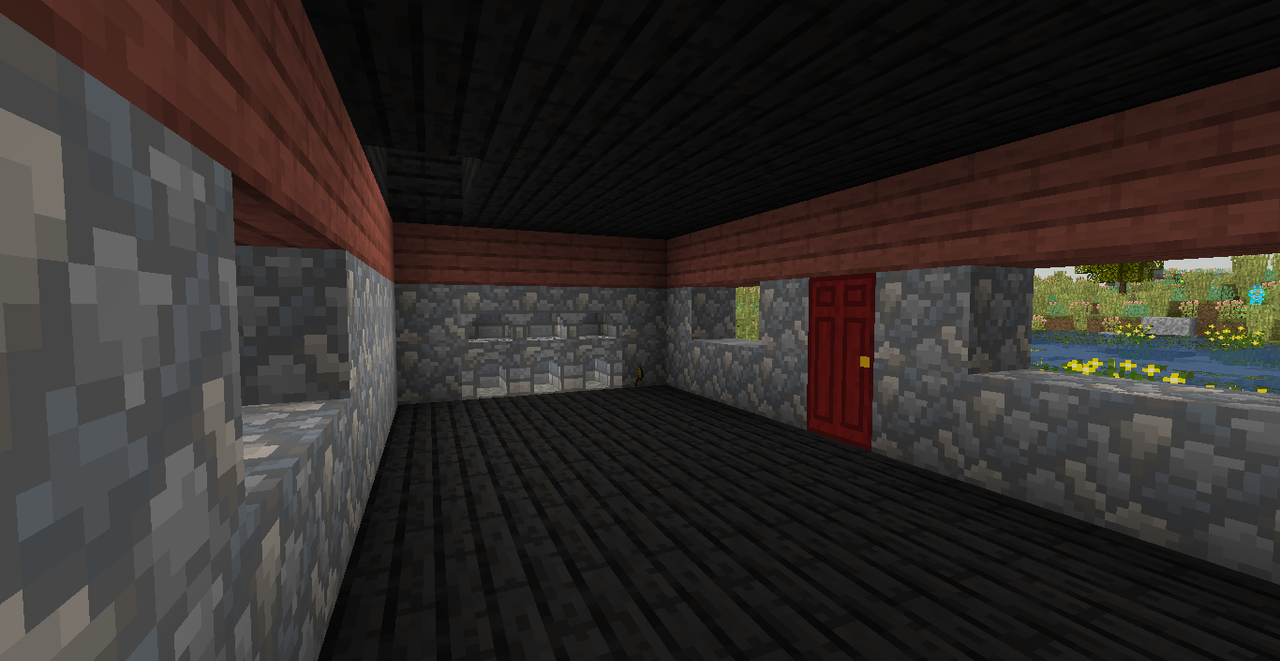
After that detour I returned home with my haul of clay and logs from up north, ready to make so many more bricks. I decided to try using the forge to fire them, since I thought it might be quicker and more fuel efficient, and oh boy was I right. I was easily making 4 or 5 bricks per charcoal, where with the pit kiln I had to use 8 logs for every 4. With my new brick making technology I was able to easily finish the ground floor of my home.
the finished bottom floor of the house
I went around checking on the various things around my homestead during all this, feeding/shearing/milking the animals and harvesting the crops that were ready. I also noted that my olive tree had grown, I'm excited to harvest it in the coming fall. By that point I had collected enough wool from the sheep for a bed, though I waited to place it until after the house was ready.
I finished the upper floor of the house, without the roof. I opted for a rustic design, using stripped logs as visible framing between the bricks and planks. I spent a long time tweaking the design, playing with a variety of shapes and material combinations. Eventually, I settled on something I liked well enough. I decided to put my bed down in the top floor and enjoyed my first real night of sleep in Terrafirmacraft, roofless but comfortable, wrapped in the blankets made of my sheep's wool. That next day I noticed that all my brick breaking and placing had done a real number on my pickaxe, so I dutifully got sidetracked from my main goal to replace it. I did it the simple way, through casting molten metal into a mold. Eventually I'm sure I'll default to forging, but for now I'm sticking to the (currently) easier path. With my new pickaxe in hand I began to work on the roof. Pretty quickly I realized I would need more chert for the design I wanted, so I put a dent in the new pick and collected extra just in case I'd need it. I spent a long time working on the roof design, though eventually I did settle on something fairly simple.
the finished upper floor
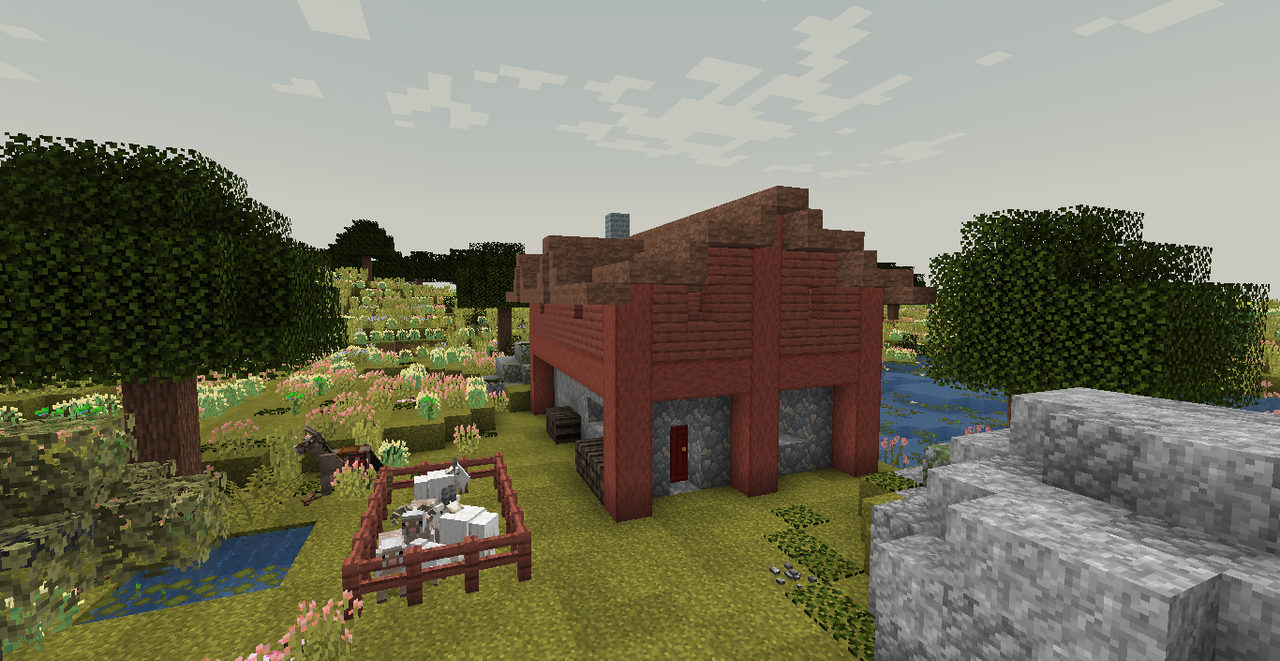
the finished house from the outside
And that's a wrap! It was a very long time coming but I'm glad I stuck it out and finished this part up. I'm still going though! I haven't given up on this playthrough, don't expect it to be like. updating frequently but I do still like this pack and I'm really into the idea of doing these posts for as long as I'm still committed. I'm not fully sure what the next segment is going to focus on but I have a feeling it's going to be about furnishing my new house, and possibly (finally) getting into some kinetics and Create stuff. Until then, though, have a good one!
But enough preamble, now is the time for
We jump back in on February 5th in the year 1001, ready to build my house. I am immediately distracted by my desire to make a wool bed. The sheep and goats are fully familiarized at this point, but I still need a pair of shears to harvest the wool. This poses a bit of difficulty for me, because I need to get into basic smithing to make shears, which is a thing I would rather not get into quite yet. With this in mind, I promptly become distracted by a different thing entirely: I noticed that my beets from last year were getting close to rotting, so in order to not waste them I boiled them down into sugar. The process is the same as making a soup, but rather than using fresh water as a base, you need salt water.
water and salt in a barrel makes salt water
beets into sugar recipe
After finishing up with the beets I finally started on the actual house build. I got through almost one layer of bricks before realizing I was going to need a lot more of them. While placing the floor down I realized I was also short on blackwood. During all this I was making frequent trips to collect firewood to fuel my brick needs, during these trips I would find and take home strawberry bushes pretty frequently, and eventually I crafted up a drying bed to preserve the fruits I was getting. The single pumpkin I planted last fall was putting in work, and I had a lot more fresh pumpkin chunks than I knew what to do with really.
After collecting more bricks and finishing the floor I decided it was time to build my oven. The oven is a freeform-ish multiblock from the FirmaLife addon, it allows for things like baking bread, pies, and pizzas. It's fairly fuel efficient and it's honestly one of my favorite parts of the addon, though those facts are unrelated. Making the oven is easy enough, each one requires a few things: at least one top oven, at least one bottom oven, a chimney, and insulation blocks. The oven is made by placing a top oven on top of a bottom oven, with chimneys placed behind them in a vertical line (like a chimney). The top and bottom oven need all sides except for the front and top to be covered by an insulation block, usually bricks. You can have more than one oven stack in a row, and the oven I built has three spaces for cooking.
my freshly placed oven, curing
Once you've placed your uncured oven parts in the world, you will have to light the oven and keep it above 600° for 80 seconds, which is actually pretty easy. This cures the oven block and any oven parts connected to it, including chimneys. Your oven is now ready to use!
my oven, cured. sorry for the nighttime picture, I'm a fool
After completing these steps for my own oven, I realized I would have to make a charcoal forge to craft the shears I needed. Then, I realized I would need a bellows to actually use the charcoal forge effectively. So I spent a lot of time building those things. But before you can make a charcoal forge you need charcoal, which is itself made by placing a bunch of logs in a pit and lighting it on fire.
process of making the tiniest charcoal pit possible
The bellows are made with two pieces of leather, which I was a little short on so I had to do all the work that entails while waiting on the charcoal, and my ever growing brick empire. The charcoal sits on the ground in layers like snow does, and all you need to make a charcoal forge is one less than a full block of layers. You light that on fire and you've got yourself a charcoal forge.
a finished forge
I made the mistake of placing my forge too close to my mud-and-sticks abode, and it caught on fire. I was able to put the fire out before anything important was destroyed, but I did spend a little time repairing the damage. It was clear to me at this point that I was going to need to finish my house quickly, before something terrible and funny happened to my current one.
***
Well dear freakboards reader, we have now come to the time where I have to explain how crafting shears works. All in all it's fairly simple: In TFC shears are crafted by welding a pair of knife blades together, this is done by heating two knife blades up in a coal forge until the tooltip says "can weld" and then very quickly transferring them to an anvil with flux in it. Then you shift-right-click on the top of the anvil with your hammer, and they're welded.
the process of making shears from knife blades
You also need to occasionally weld ingots together into double ingots (for making sheets), and sheets into double sheets. Some armor pieces also require welding some parts together for the final craft. Once we get pretty far into the Create stuff I'll actually be able to use machinery to make the welding process much easier.
the welding recipe for a double ingot
the welding recipe for a steel helmet
This is, at the end of the day, not an overly complex process. Unfortunately, at many times I have the attention span of a salmon, which meant this process took me over an hour in between a dozen other little things I was trying to do at the same time. I accidentally fully lost an entire ingot of copper because I melted it in the forge, I failed repeatedly to get the knives hot enough to get them on the anvil and weld them before they became too cold, it was miserable. I was in shear hell. I truly don't know how I fucked it up as bad as I did but it was awful, and though I did eventually craft the shears I was covered in a mixture of blood, forge induced sweat, and tears by the time it was done.
***
After my shears adventure, I was finally able to fully focus on the building. I finished the ground floor of my house, only to realize I actually wanted to change my original design completely, and instead I wanted to do something that would require a whole lot more bricks. This meant more clay, and so I had to go back out into the northern clay reaches. In preparation for this clay gathering trip I decided to craft a compass. I don't remember my reasoning for this, but my best guess is that I wanted to rely less on the mapping mod and rely more on landmarks and orientation, which I recognize is nuts but to be fair I am playing Terrafirmacraft. Once I had the compass though I realize it was a re-skinned vanilla compass, and pointed towards spawn rather than north. To remedy this, I installed the northern compass mod.
After that detour I returned home with my haul of clay and logs from up north, ready to make so many more bricks. I decided to try using the forge to fire them, since I thought it might be quicker and more fuel efficient, and oh boy was I right. I was easily making 4 or 5 bricks per charcoal, where with the pit kiln I had to use 8 logs for every 4. With my new brick making technology I was able to easily finish the ground floor of my home.
the finished bottom floor of the house
I went around checking on the various things around my homestead during all this, feeding/shearing/milking the animals and harvesting the crops that were ready. I also noted that my olive tree had grown, I'm excited to harvest it in the coming fall. By that point I had collected enough wool from the sheep for a bed, though I waited to place it until after the house was ready.
I finished the upper floor of the house, without the roof. I opted for a rustic design, using stripped logs as visible framing between the bricks and planks. I spent a long time tweaking the design, playing with a variety of shapes and material combinations. Eventually, I settled on something I liked well enough. I decided to put my bed down in the top floor and enjoyed my first real night of sleep in Terrafirmacraft, roofless but comfortable, wrapped in the blankets made of my sheep's wool. That next day I noticed that all my brick breaking and placing had done a real number on my pickaxe, so I dutifully got sidetracked from my main goal to replace it. I did it the simple way, through casting molten metal into a mold. Eventually I'm sure I'll default to forging, but for now I'm sticking to the (currently) easier path. With my new pickaxe in hand I began to work on the roof. Pretty quickly I realized I would need more chert for the design I wanted, so I put a dent in the new pick and collected extra just in case I'd need it. I spent a long time working on the roof design, though eventually I did settle on something fairly simple.
the finished upper floor
the finished house from the outside
And that's a wrap! It was a very long time coming but I'm glad I stuck it out and finished this part up. I'm still going though! I haven't given up on this playthrough, don't expect it to be like. updating frequently but I do still like this pack and I'm really into the idea of doing these posts for as long as I'm still committed. I'm not fully sure what the next segment is going to focus on but I have a feeling it's going to be about furnishing my new house, and possibly (finally) getting into some kinetics and Create stuff. Until then, though, have a good one!
Signature Under Construction
(until I think of a better one)-
SkieSquiggles
- They/It
- Posts: 1754
- Joined: Sat Nov 19, 2022 7:29 pm
- Contact:
Re: Squiggles' Terrafirmacraft Playthrough!
I return one again, in style of a cat bringing forth a dead animal or somesuch, to deliver unto you my beloved audience another installment in my Terrafirmacraft playthrough. This part is all about filling out my new home, but before I started that, I had to update the modpack to version 1.10, and I went online to get ahold of a texture pack to make carpets a little more decorative. I also decided to remove Better Combat in the interest of using First Person Model with Not Enough Animations. This change is mostly aesthetic, I don't fight things enough in this pack to really warrant the stuff from Better Combat and I really like the way playing with First Person Model feels.
Now, we are ready to begin...
I started this session with a short to-do list:
- build waterwheel and grindstone
- make red, blue, and green large vessels for decoration
- make a cabinet out of chests and trapdoors/doors
- put a loom somewhere in the house
- build some shelves
- put some paintings up
- make a carpet
This list wasn't in any particular order, it was just the stuff that I wanted to make sure I had in the house.
I started with the waterwheel and grindstone. These are the first things from Create that we're going to be playing with, which is very exciting! Create is a mod that affords a lot of potential possibilities down the line, though at this stage of progression we're pretty limited in what tools we have access to. I'm not going to provide a full explanation of how the mod works in this section because there's genuinely a plethora of resources, especially youtube videos, that go over the way it functions.
My Wheeal!!
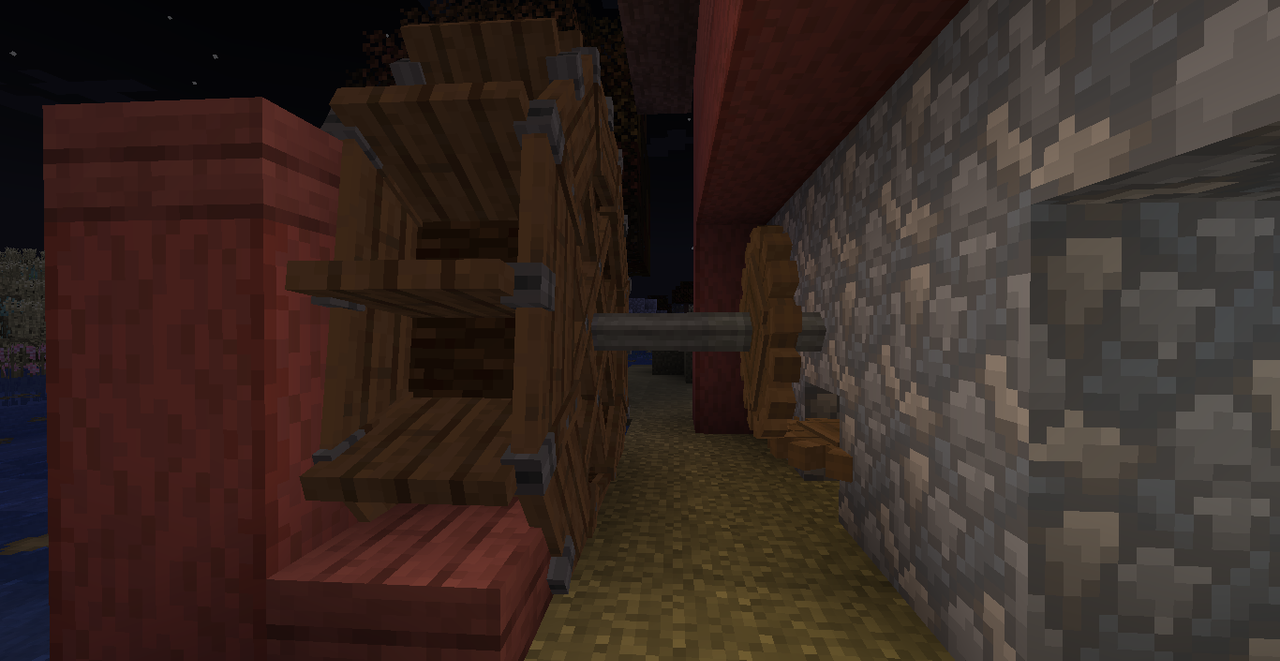
The waterwheel only turns when it touches flowing water, so I built a little culvert coming off of the lake behind my house and put it there. The basic blocks that you use to connect things using Create are shafts, right now the only recipe I can use to make them uses raw stone and a chisel. Thankfully I already happened to have some raw stone from the boulder I destroyed a few parts ago.
I crafted the millstone and placed in on the inside of the wall where I had put the waterwheel, and connected them using some shafts and large cogs. The millstone is similar to the quern but it runs using Create's kinetic power system, and there are a handful of differences between recipes.
The power of the waterwheel translated to automatic crushing.
With the first thing on my list done, I had to spend a little time tending to upkeep on the farm. The ewe and nanny goat had given birth, so I now needed to feed the babies grain every day to familiarize them. I also harvested some mature crops and planted new ones that were appropriate for the season.
My animals are coming along very well at this stage.

I built a little side table out of stairs and slabs by the front door of the house and placed my loom onto it. I also took the tool rack from my old workshop and put it right next to the door.
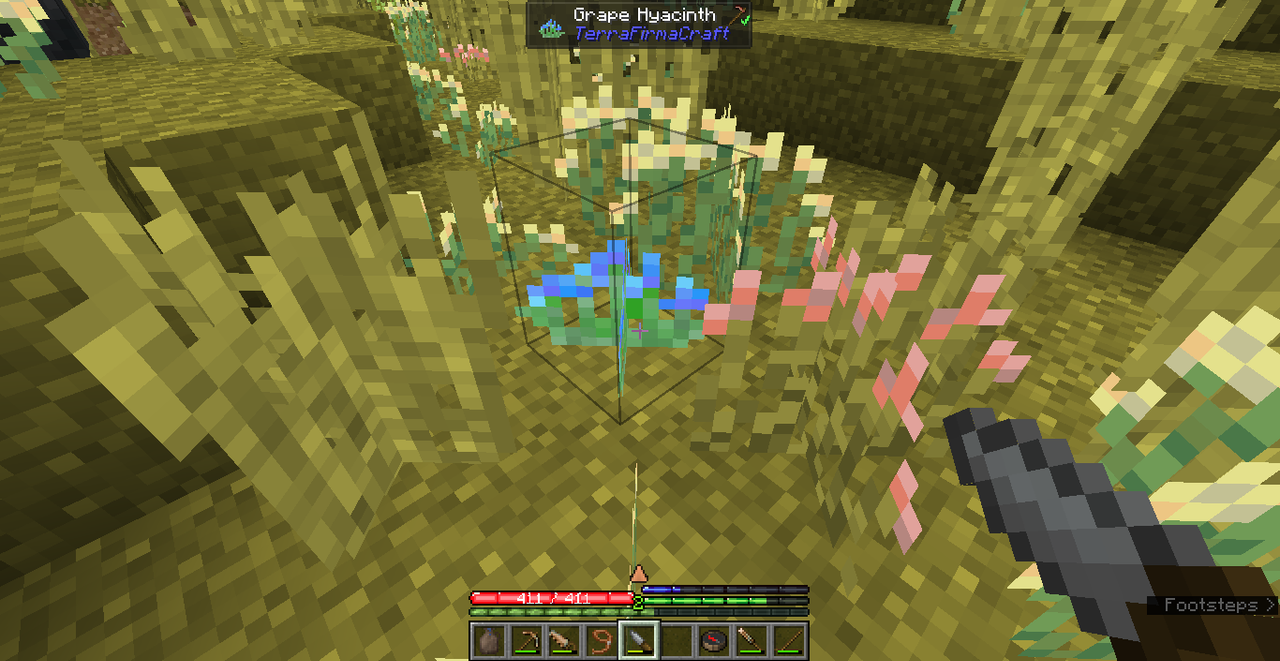
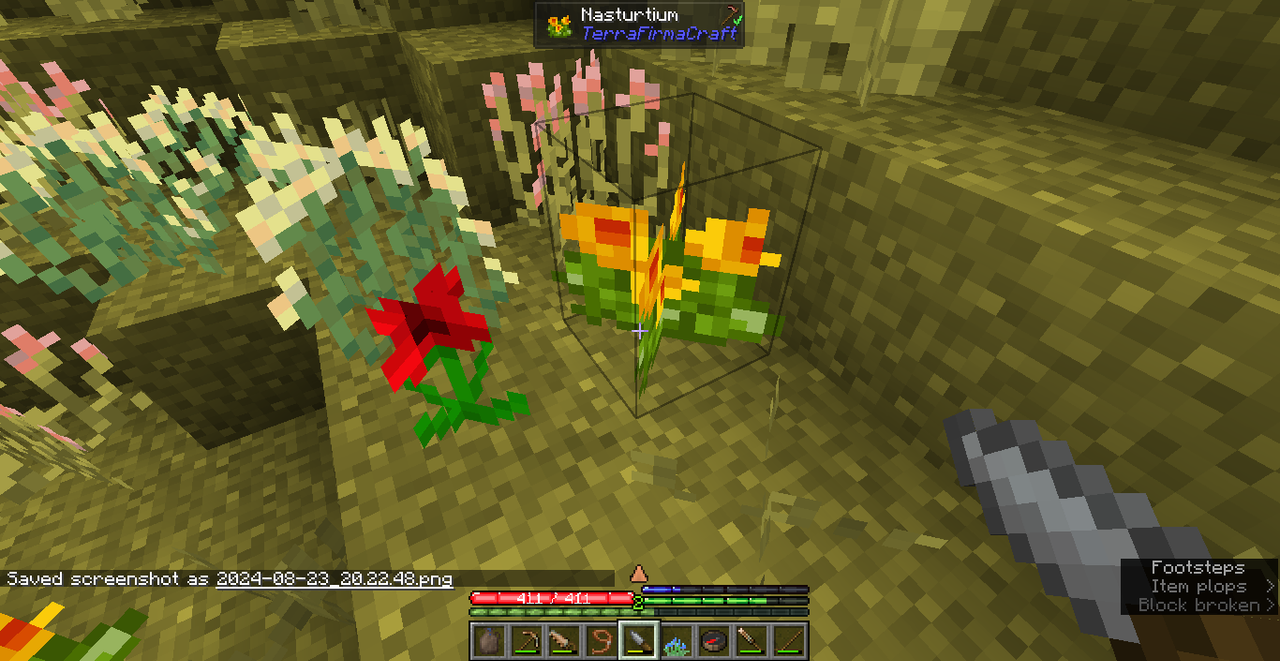
Bored of doing little things, I decided to go on a quick journey to find dye materials for the large vessels and the carpets. I loaded up on food and water and set off on my loyal donkey. I headed north, where the climate was a bit cooler and wetter. It wasn't hard to find most of the flowers I needed for dyes, but I was having trouble finding green dye, which required me to get some moss or lichen.
Some flowers I found in the wild.
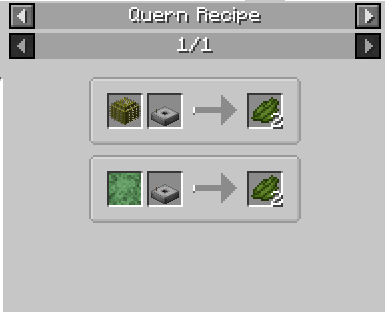
The recipes for green dye.
I eventually found it but I had to go pretty far out of my way to do so, and experienced some rough travel in the process. I nearly died a couple of times from falling into a pit with the donkey and knocking my head around on the ceiling, and my donkey nearly died once from drowning in a ravine! It's definitely way easier to fall into pits on horseback in tfc, considering the plants covering the ground blocking my line of sight.
Unfortunately, that wasn't the least of my worries. I took a new route on my way home, and ran into a large pack of wolves. I was able to dismount from my donkey before they hurt it too badly, but they extremely killed me in the process. I traversed back to where they had killed me, and waited for daylight, as the wolves sleep during the day. I very slowly and carefully retrieved my things from my corpse, and rode away on my donkey.
A look at bread-making in minecraft. Would you believe that in earlier versions it was actually much more involved? *dreamy sigh*

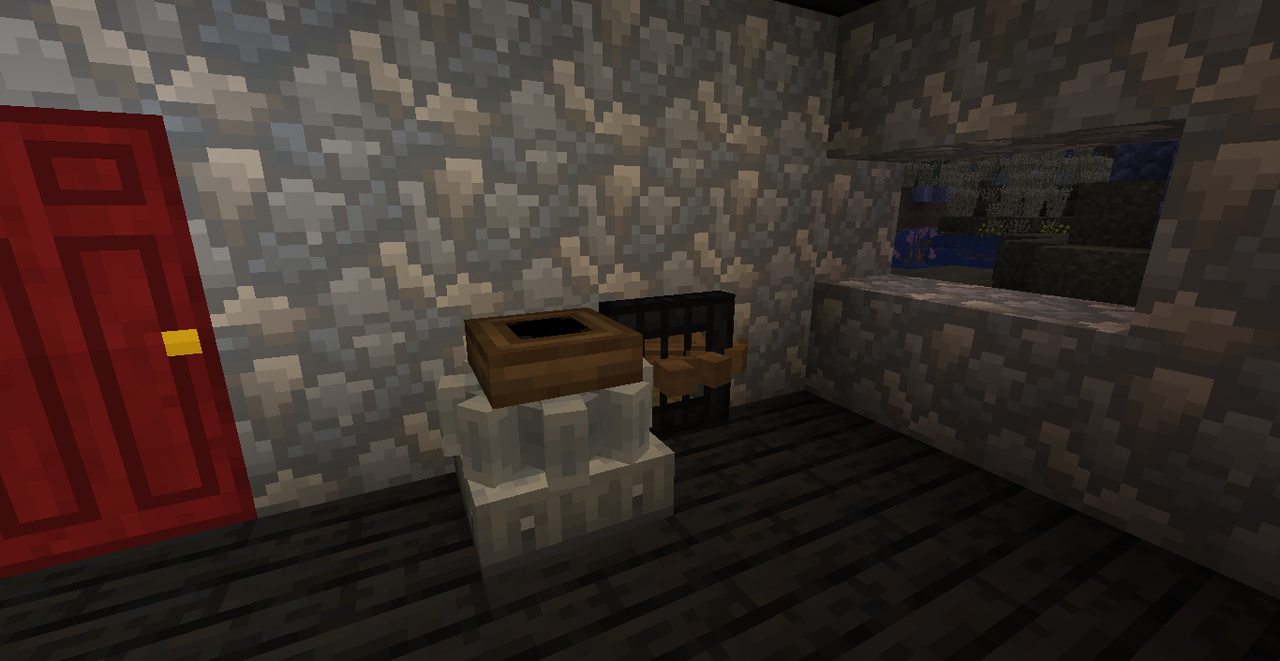
Upon my return home I was struck with the urge to make flatbread with my new oven, so I spent a lot of time doing that instead of any of the things on my to-do list. The bread-making process is, as with many things, more involved in than in the vanilla game. You first need to grind the grain down into flour, then you need to mix it with water to create the flatbread dough. I'm still a long way off to make a proper loaf, as that requires a sweetner like honey or sugar, and a supply of yeast starter (which you start by fermenting fruit in water, then feeding it flour every so often).
The oven itself is pretty easy to use, you only need to light one of the oven bottoms, which will heat all of the ovens connected to it. You can bake up to 4 things per oven at a time, and you need to remove the items with a peel when they're done. The oven also produces Wood Ash, which has some practical uses.
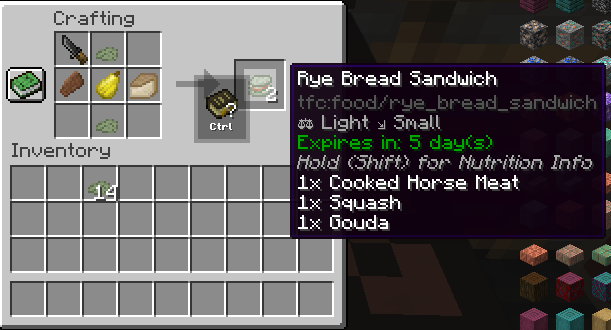
I used my bread to finally make my first sandwich! Sandwiches are one of the three special food types in tfc, and they function pretty similarly to soups and salads. You craft two pieces of bread (either two slices of a loaf, or two pieces of flatbread), three ingredients, and a knife together, and voila! A sandwich is made. The ingredients can be any vegetable, meat, or cheese. Practically speaking, sandwiches are a great way to cover multiple nutritional sources at once, since if you use an ingredient of each type it'll count towards protein, dairy, vegetables, and grains all at once. I mostly just like sandwiches for the sake of sandwiches myself.
Here's a deeply fucked up horse squash and gouda sandwich I made.
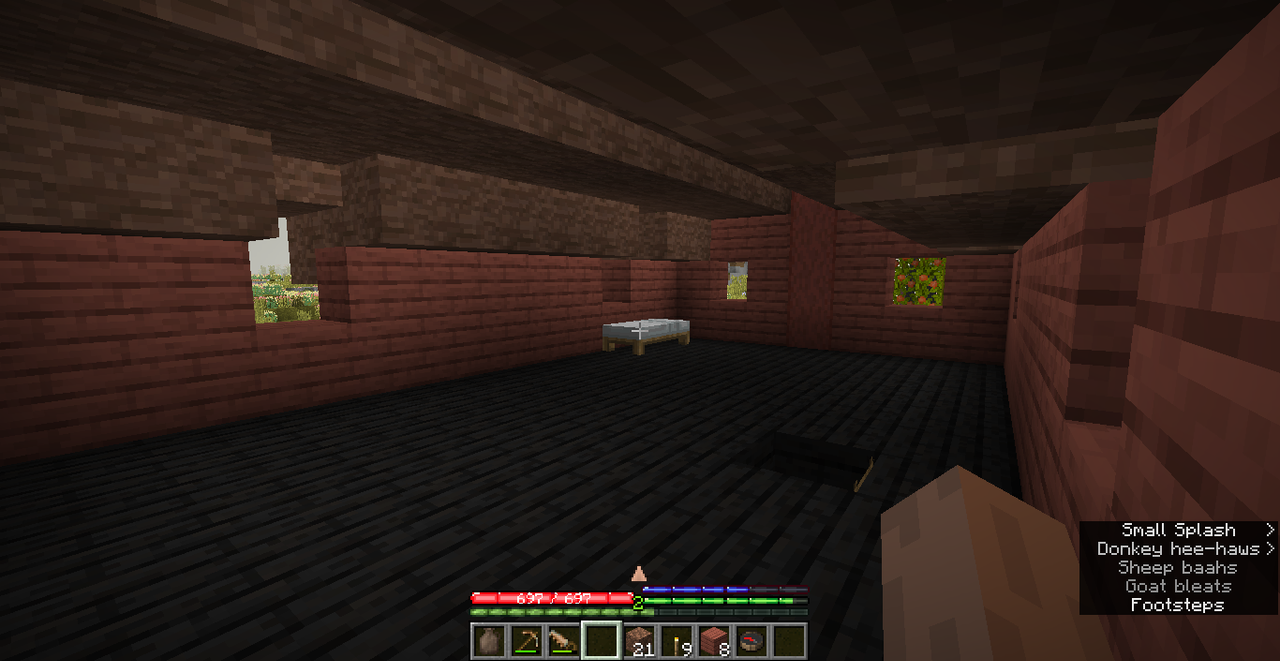
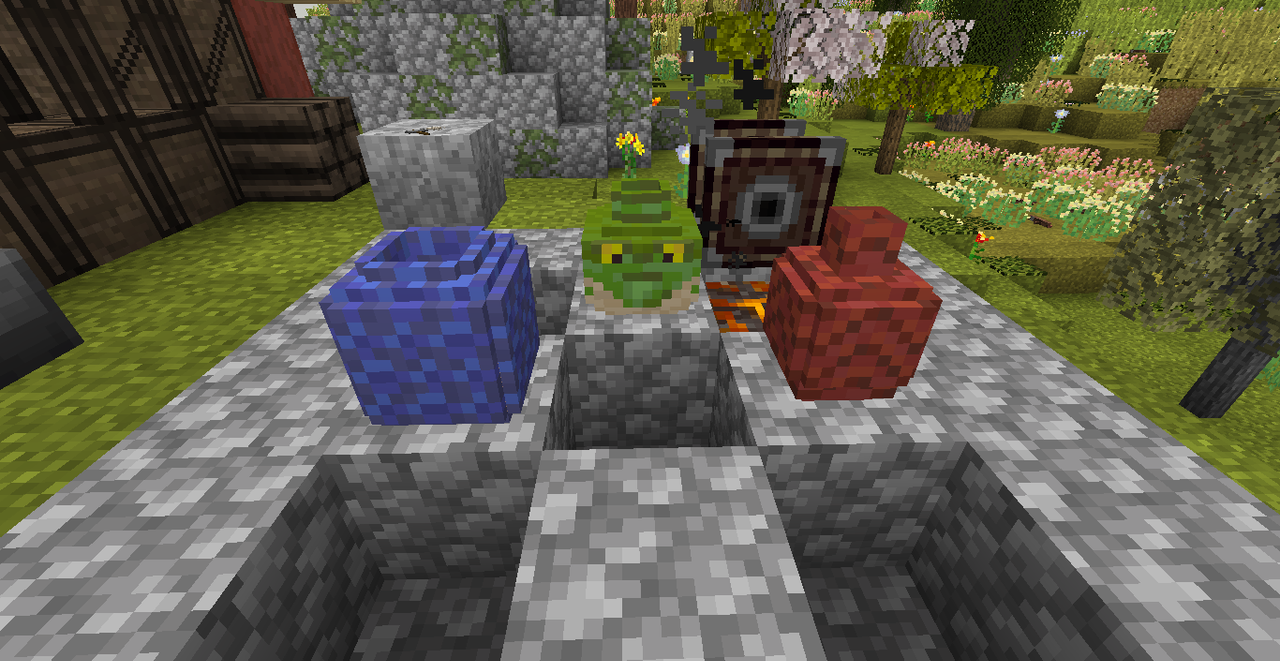
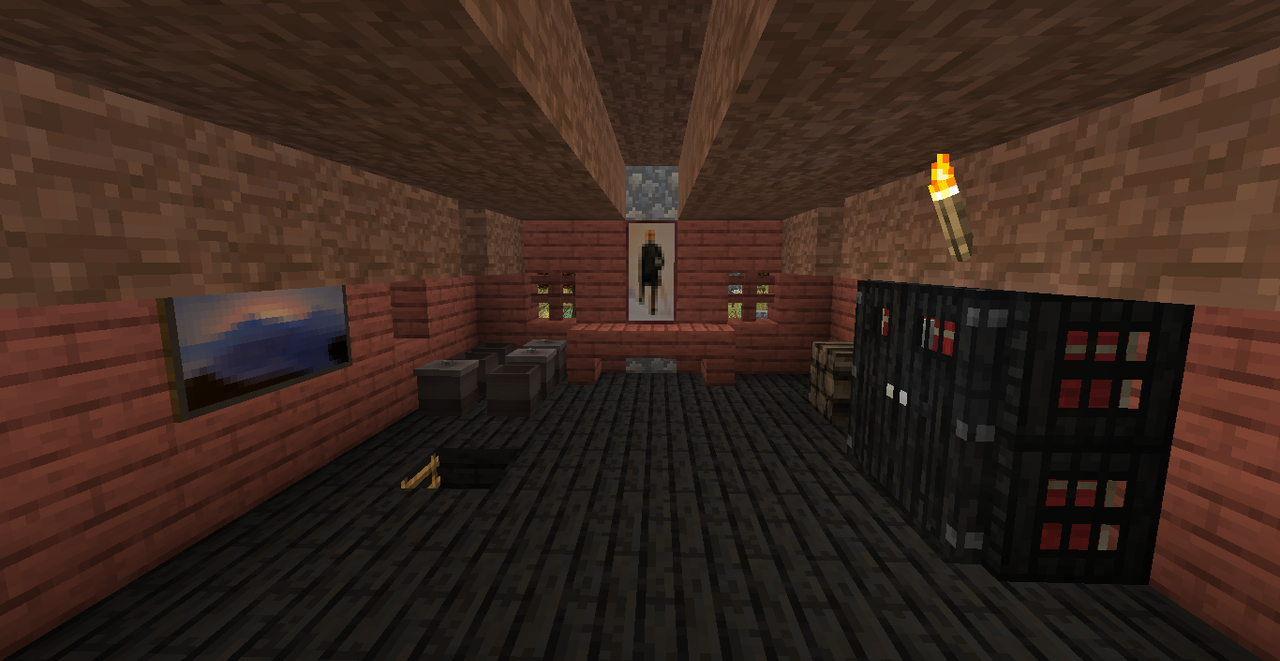
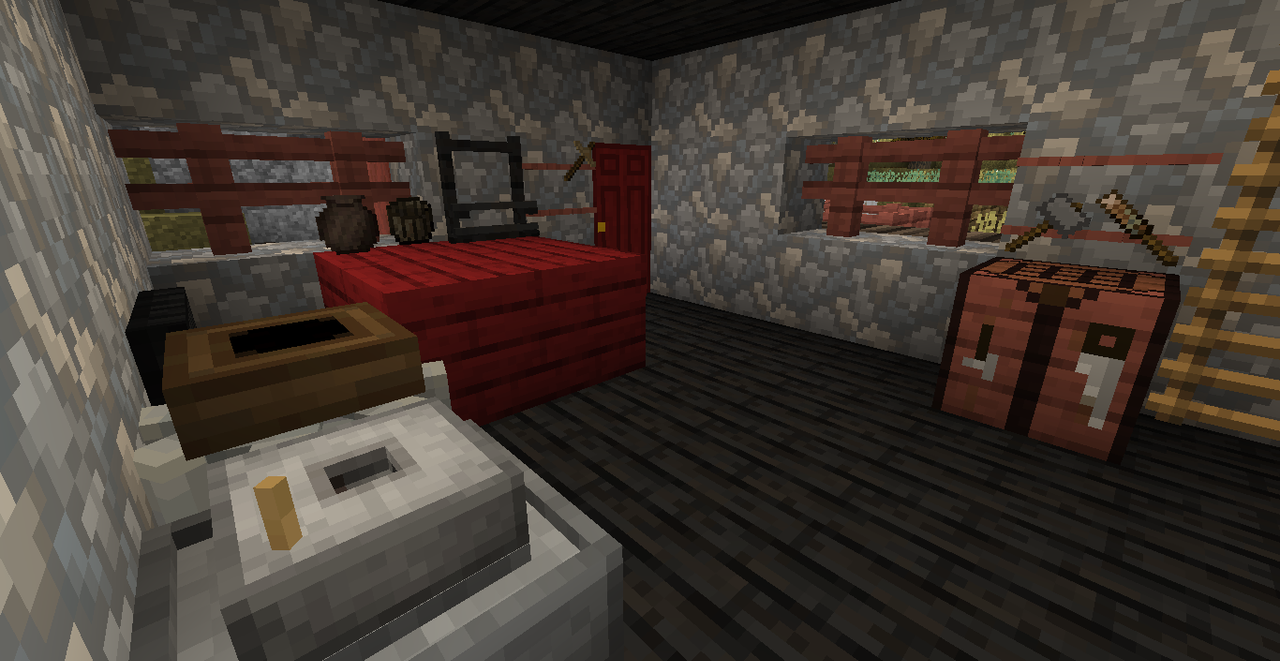
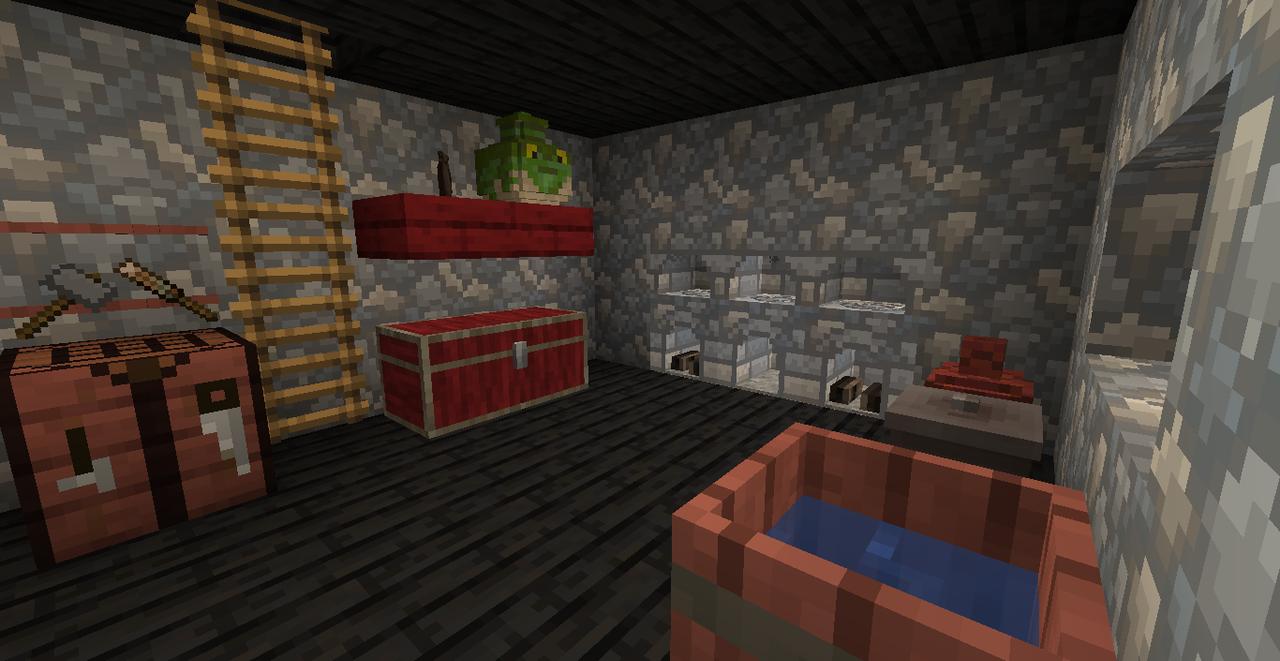
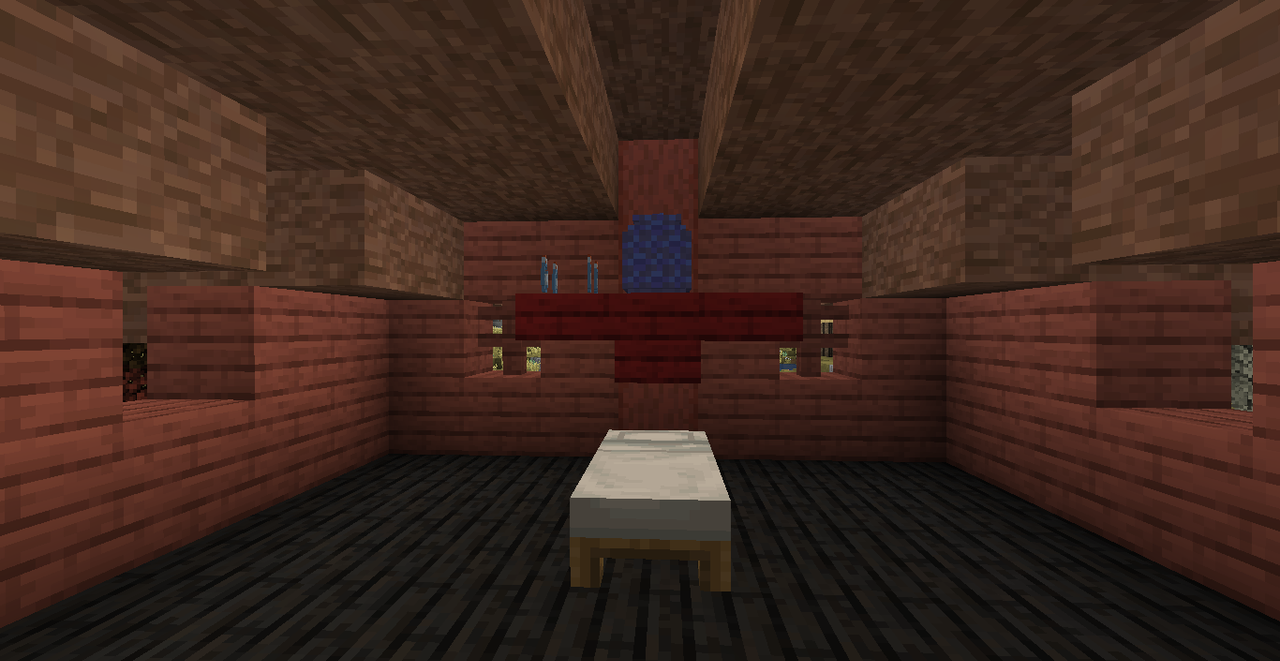
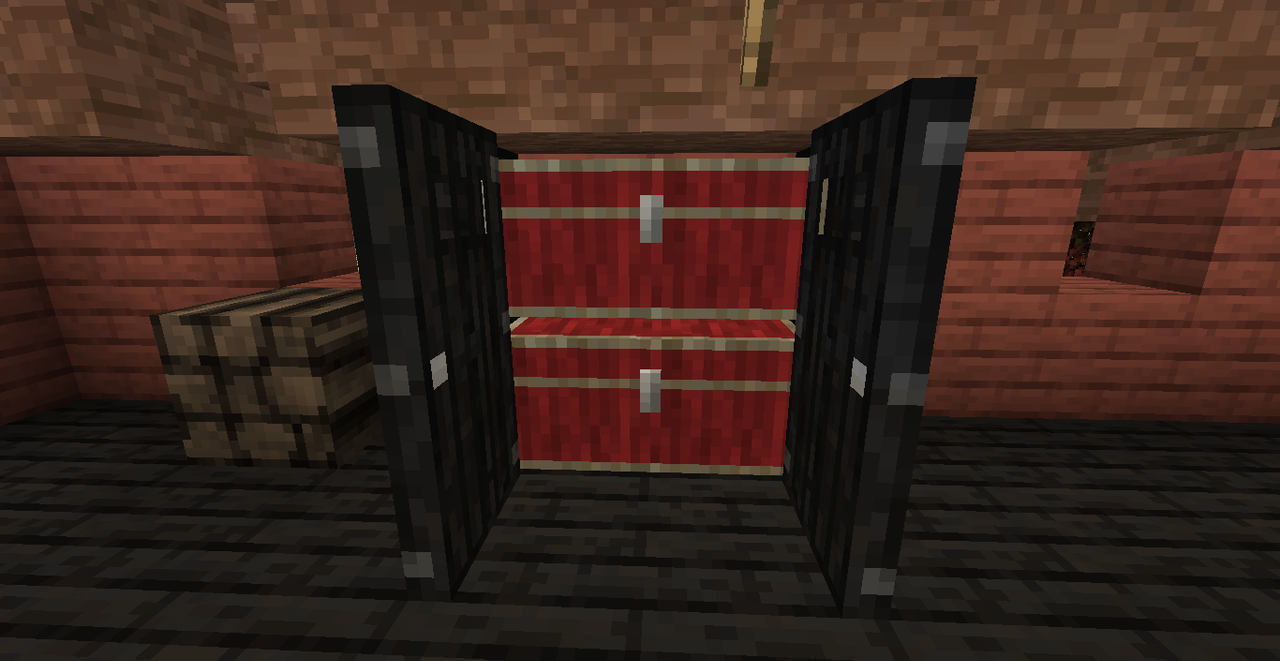
With a large stockpile of bread in my food storage, I started moving my things from the old house into the new one. The things from my workshop like the crafting table, tool rack, and storage chests. I put up a couple of paintings, fired up some fancy-looking dyed vessels and placed them around the house, built a cabinet with some chests and trapdoors, and fit some fences into window holes. Finally, I built a simple dock out on the lake, with a fruit-drying table.
House Tour!! I'm really happy with how it looks to be honest, I think I decorated well with the limited material I had access to.
Once I had finished with that, I got distracted with food again. Firmalife adds a new system for preserving meats: smoking. This consists of suspending brined meat over a campfire for several in-game hours, just like real life I suppose. It lengthens the lifespan of the food pretty greatly but the smoking itself is highly inconvenient, as you can only smoke up to four meats at a time per campfire.
This is how you smoke meat!
While doing this I noticed that the Firmalife food processes can sometimes get caught in a weird loop of resetting itself, which I'm pretty sure is a result of unloading the chunk where it's located? Not sure exactly, but it's a little annoying. I'll probably have to start chunkloading my home.
By the end of this session I had done nearly everything I had set out to do. The only thing left to do is make carpet but unfortunately the sheep take some time to grow wool, so this is where we will have to leave it for now. Not sure what I'll do next time, probably work towards progression of some kind now that I have a nice house. I will definitely be doing more of this playthrough but y'all should probably expect long gaps for the foreseeable future lol. Thanks for reading along so far, until next time!
Now, we are ready to begin...
I started this session with a short to-do list:
- build waterwheel and grindstone
- make red, blue, and green large vessels for decoration
- make a cabinet out of chests and trapdoors/doors
- put a loom somewhere in the house
- build some shelves
- put some paintings up
- make a carpet
This list wasn't in any particular order, it was just the stuff that I wanted to make sure I had in the house.
I started with the waterwheel and grindstone. These are the first things from Create that we're going to be playing with, which is very exciting! Create is a mod that affords a lot of potential possibilities down the line, though at this stage of progression we're pretty limited in what tools we have access to. I'm not going to provide a full explanation of how the mod works in this section because there's genuinely a plethora of resources, especially youtube videos, that go over the way it functions.
My Wheeal!!
The waterwheel only turns when it touches flowing water, so I built a little culvert coming off of the lake behind my house and put it there. The basic blocks that you use to connect things using Create are shafts, right now the only recipe I can use to make them uses raw stone and a chisel. Thankfully I already happened to have some raw stone from the boulder I destroyed a few parts ago.
I crafted the millstone and placed in on the inside of the wall where I had put the waterwheel, and connected them using some shafts and large cogs. The millstone is similar to the quern but it runs using Create's kinetic power system, and there are a handful of differences between recipes.
The power of the waterwheel translated to automatic crushing.
With the first thing on my list done, I had to spend a little time tending to upkeep on the farm. The ewe and nanny goat had given birth, so I now needed to feed the babies grain every day to familiarize them. I also harvested some mature crops and planted new ones that were appropriate for the season.
My animals are coming along very well at this stage.
I built a little side table out of stairs and slabs by the front door of the house and placed my loom onto it. I also took the tool rack from my old workshop and put it right next to the door.
Bored of doing little things, I decided to go on a quick journey to find dye materials for the large vessels and the carpets. I loaded up on food and water and set off on my loyal donkey. I headed north, where the climate was a bit cooler and wetter. It wasn't hard to find most of the flowers I needed for dyes, but I was having trouble finding green dye, which required me to get some moss or lichen.
Some flowers I found in the wild.
The recipes for green dye.
I eventually found it but I had to go pretty far out of my way to do so, and experienced some rough travel in the process. I nearly died a couple of times from falling into a pit with the donkey and knocking my head around on the ceiling, and my donkey nearly died once from drowning in a ravine! It's definitely way easier to fall into pits on horseback in tfc, considering the plants covering the ground blocking my line of sight.
Unfortunately, that wasn't the least of my worries. I took a new route on my way home, and ran into a large pack of wolves. I was able to dismount from my donkey before they hurt it too badly, but they extremely killed me in the process. I traversed back to where they had killed me, and waited for daylight, as the wolves sleep during the day. I very slowly and carefully retrieved my things from my corpse, and rode away on my donkey.
A look at bread-making in minecraft. Would you believe that in earlier versions it was actually much more involved? *dreamy sigh*
Upon my return home I was struck with the urge to make flatbread with my new oven, so I spent a lot of time doing that instead of any of the things on my to-do list. The bread-making process is, as with many things, more involved in than in the vanilla game. You first need to grind the grain down into flour, then you need to mix it with water to create the flatbread dough. I'm still a long way off to make a proper loaf, as that requires a sweetner like honey or sugar, and a supply of yeast starter (which you start by fermenting fruit in water, then feeding it flour every so often).
The oven itself is pretty easy to use, you only need to light one of the oven bottoms, which will heat all of the ovens connected to it. You can bake up to 4 things per oven at a time, and you need to remove the items with a peel when they're done. The oven also produces Wood Ash, which has some practical uses.
I used my bread to finally make my first sandwich! Sandwiches are one of the three special food types in tfc, and they function pretty similarly to soups and salads. You craft two pieces of bread (either two slices of a loaf, or two pieces of flatbread), three ingredients, and a knife together, and voila! A sandwich is made. The ingredients can be any vegetable, meat, or cheese. Practically speaking, sandwiches are a great way to cover multiple nutritional sources at once, since if you use an ingredient of each type it'll count towards protein, dairy, vegetables, and grains all at once. I mostly just like sandwiches for the sake of sandwiches myself.
Here's a deeply fucked up horse squash and gouda sandwich I made.
With a large stockpile of bread in my food storage, I started moving my things from the old house into the new one. The things from my workshop like the crafting table, tool rack, and storage chests. I put up a couple of paintings, fired up some fancy-looking dyed vessels and placed them around the house, built a cabinet with some chests and trapdoors, and fit some fences into window holes. Finally, I built a simple dock out on the lake, with a fruit-drying table.
House Tour!! I'm really happy with how it looks to be honest, I think I decorated well with the limited material I had access to.
Once I had finished with that, I got distracted with food again. Firmalife adds a new system for preserving meats: smoking. This consists of suspending brined meat over a campfire for several in-game hours, just like real life I suppose. It lengthens the lifespan of the food pretty greatly but the smoking itself is highly inconvenient, as you can only smoke up to four meats at a time per campfire.
This is how you smoke meat!
While doing this I noticed that the Firmalife food processes can sometimes get caught in a weird loop of resetting itself, which I'm pretty sure is a result of unloading the chunk where it's located? Not sure exactly, but it's a little annoying. I'll probably have to start chunkloading my home.
By the end of this session I had done nearly everything I had set out to do. The only thing left to do is make carpet but unfortunately the sheep take some time to grow wool, so this is where we will have to leave it for now. Not sure what I'll do next time, probably work towards progression of some kind now that I have a nice house. I will definitely be doing more of this playthrough but y'all should probably expect long gaps for the foreseeable future lol. Thanks for reading along so far, until next time!
Last edited by SkieSquiggles on Sun May 04, 2025 5:16 pm, edited 1 time in total.
Signature Under Construction
(until I think of a better one)-
SkieSquiggles
- They/It
- Posts: 1754
- Joined: Sat Nov 19, 2022 7:29 pm
- Contact:
Re: Squiggles' Terrafirmacraft Playthrough!
 Strap in everyone because some fucked up shit happens to me in this harrowing installment of...
This part was played basically immediately after the last one, so I'm Still waiting for those sheep to produce enough wool for my carpet. I get bored pretty quickly doing this, so I try to think a little proactively and find some Zinc deposits for when I'll need them later for alloying. I spend a lot of time walking in large circles, a couple of hours of at least. Part of my strategy in searching for zinc hinges on finding large deposits of Quartzite, which is a common stone for it to generate in.
I *finally* find the edge of an area of Quartzite and then out of nowhere a pack of Direwolves rush out of the groundcover and absolutely murder my dear and beloved (and so far un-named) donkey! To add insult to very literal injury, my donkey had been carrying a pretty decent haul of logs. I felt that it was to dangerous to try retrieving them, so I had to cut my losses and flee.
I spent the next few hours searching for zinc on foot. I didn't want to go home empty handed, not when the Donkey had given up it's life for me. Besides that, I would still *need* zinc later, so I might as well find it now. I had to hunt and gather as I traveled, lighting campfires occasionally to cook and collecting water when I could. Long travel in tfc is a lot more interesting and engaging than vanilla.
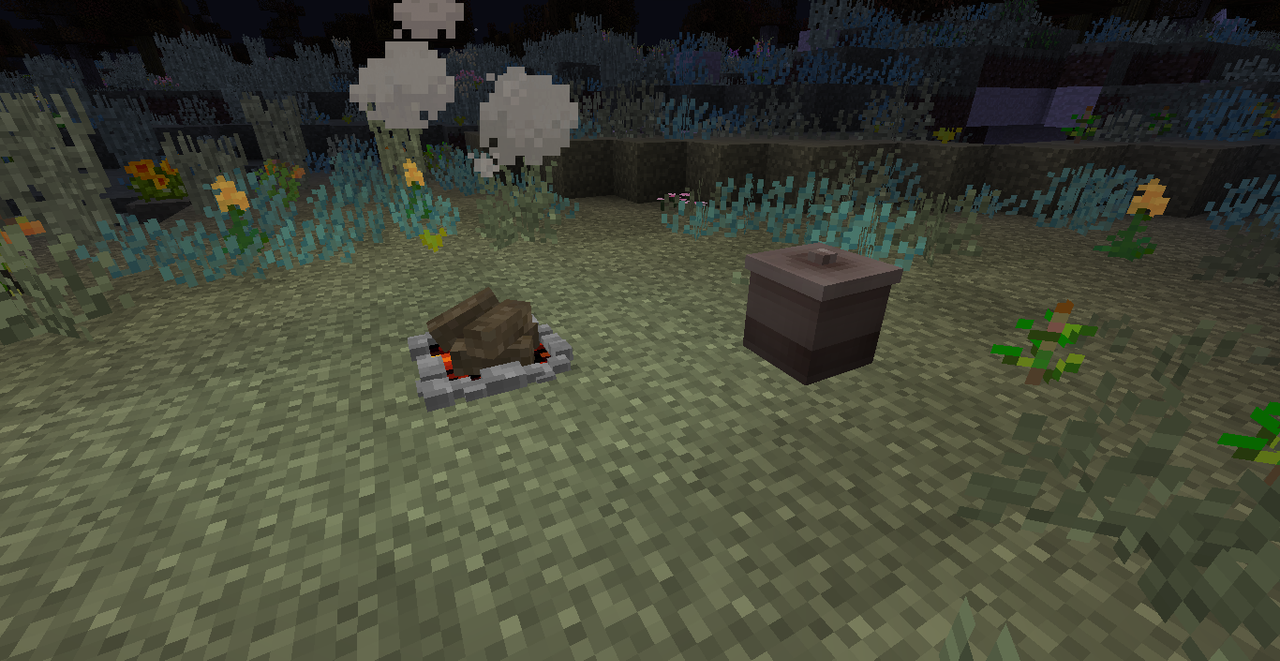
Camping in the wilderness
After days of wandering I came upon some sphalerite nuggets on the surface near the entrance to a cave. I set up shop in the cave entrance and started exploring it's depths, using my prospector's pick to guide me.
The prospector's pick is absolutely necessary for locating deep underground veins of ore, especially in the early game. You click on the ground with the pick, and it searches a 25x25x25 block cube centered on the block you clicked, and depending on how much ore is in that cube you'll get a different message. The usefulness of this is unfortunately tempered somewhat by the possibility that the pick will occasionally fail to report ore, and the radius is so wide and vague you still need to do a lot of digging to determine where the ore actually is.
It's a very slow and tortured process, with me making a ton of little mineshafts into the stone walls to try and locate the vein. I was able to find it eventually, and mined out the ore for what felt like weeks until my pickaxe broke.
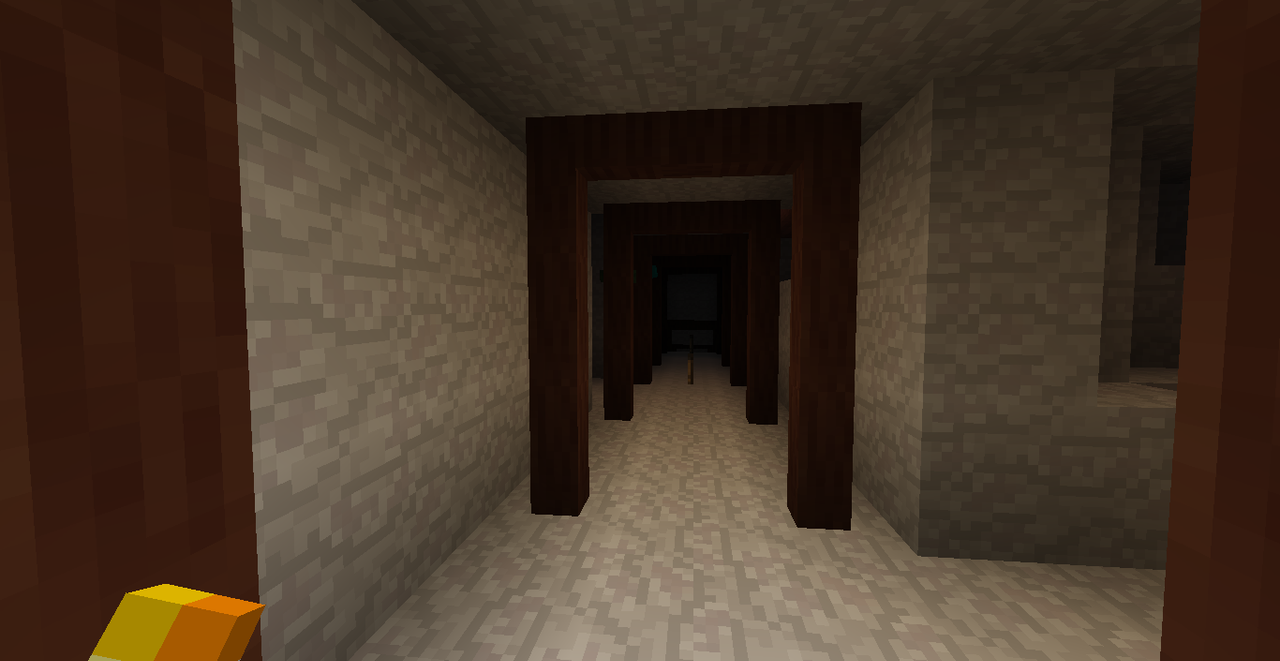
Tour of the mine:
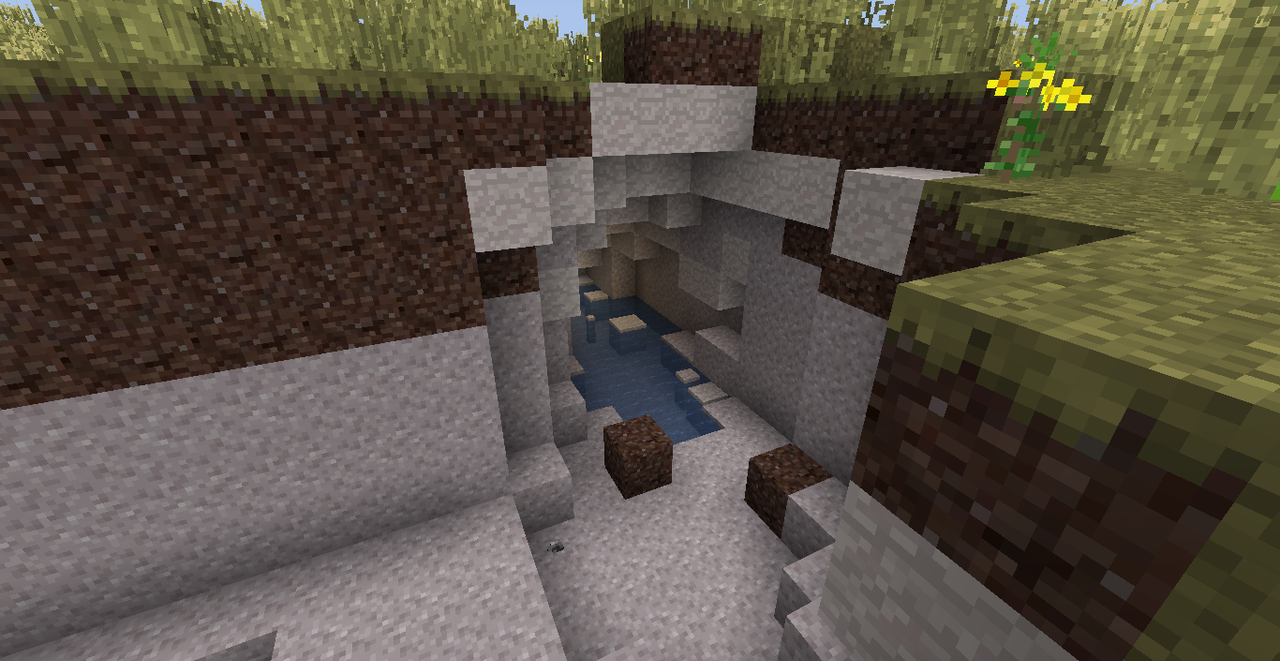
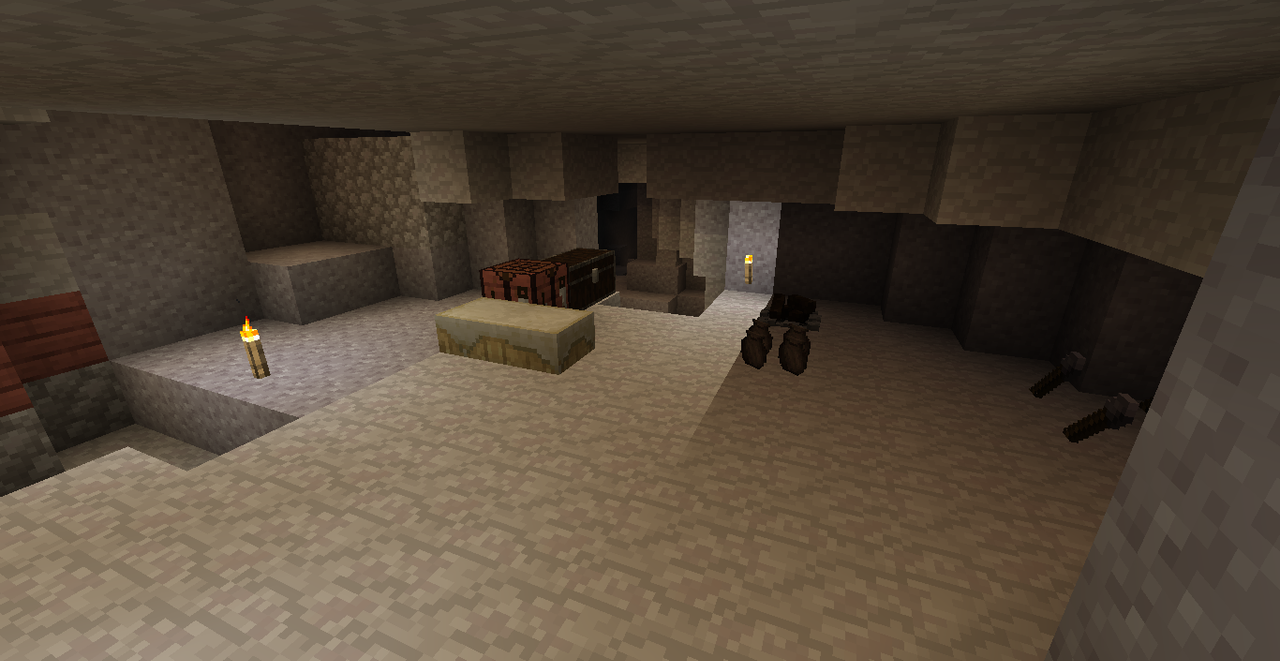
The entrance of the cave (left); the camp I made inside the cave (right).
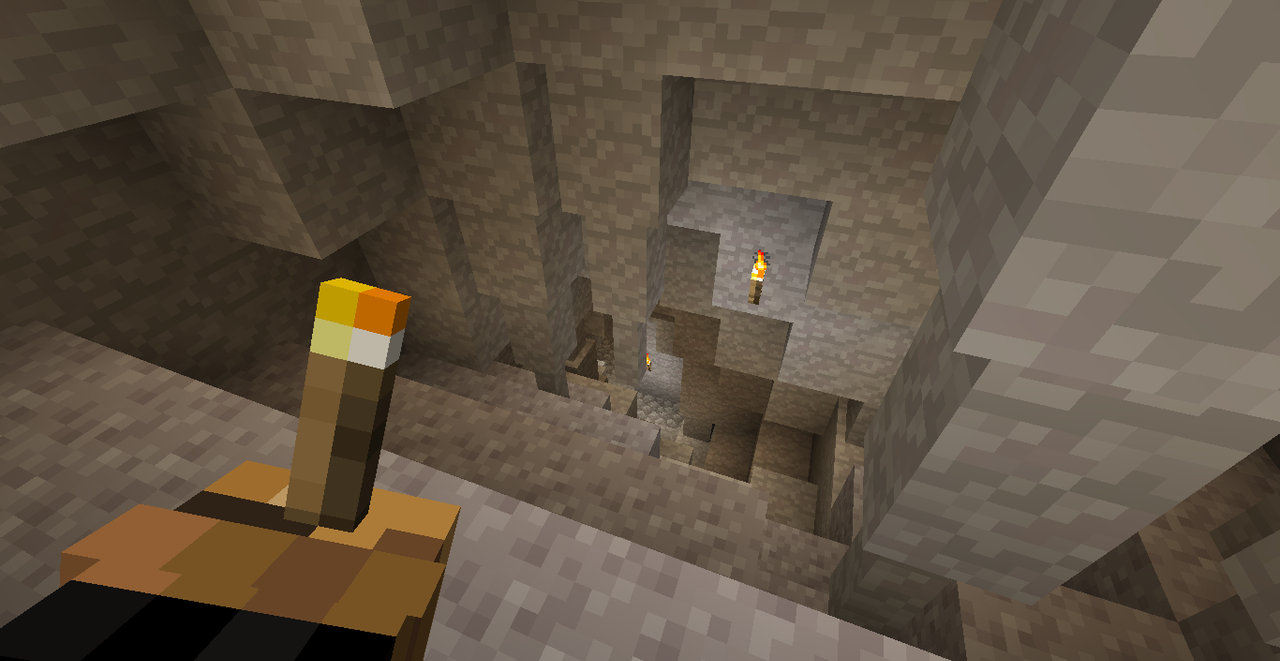

The top of the first descent into the cave (left); the crevice at the bottom of the first descent (right)
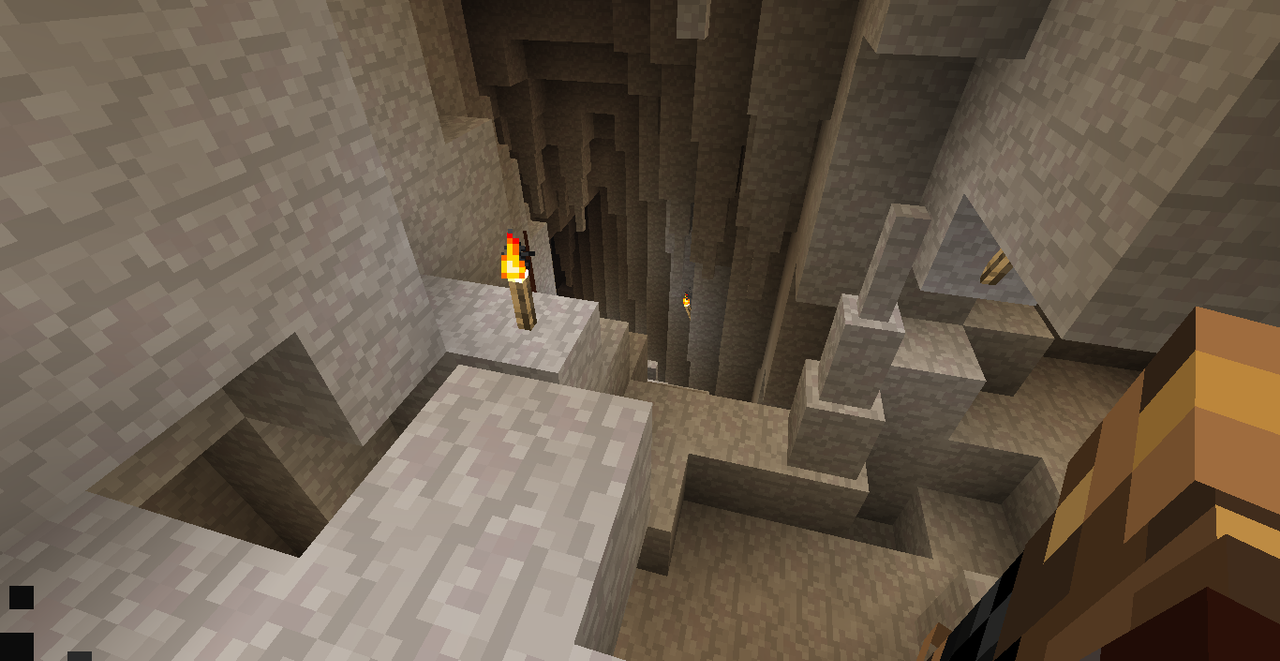
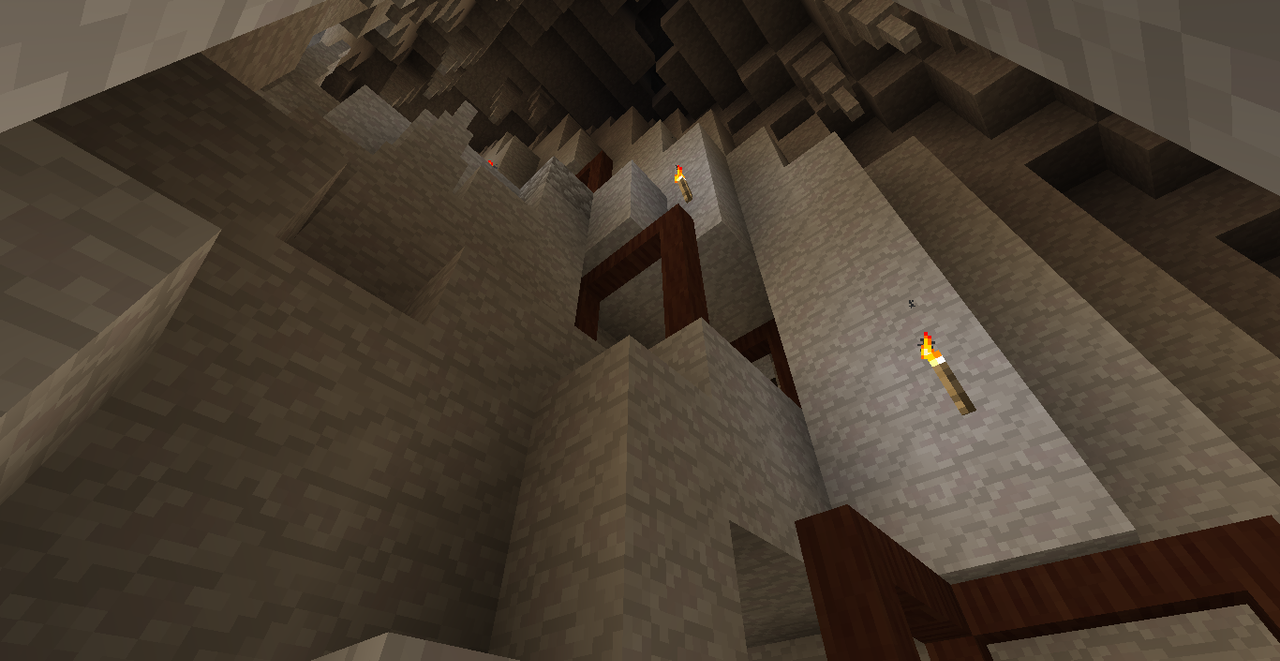
The top of the second descent (left); the bottom of the second descent, looking up, showing the various mineshafts dug into the rock (right)
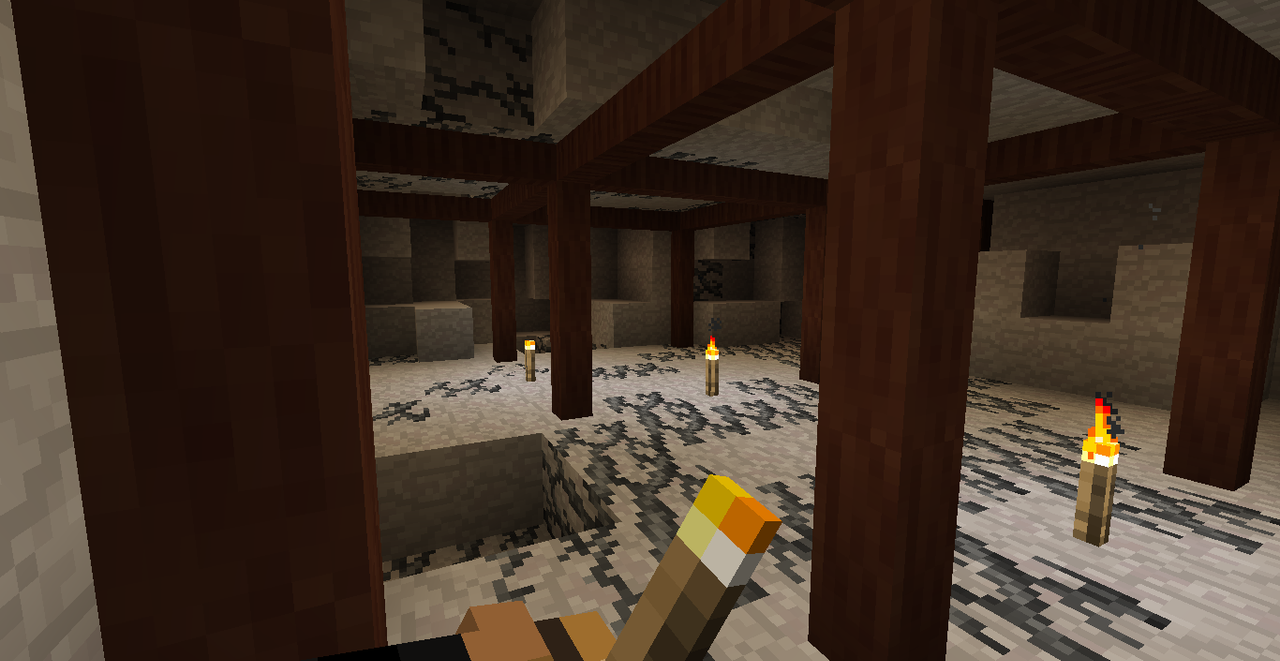
Where the ore was actually found
I had to spend a couple of days to make vessels to carry all of the ore out of the cave, and I ended up leaving with a large vessel filled with small vessels of ore. I also took some Hickory with me, and I was able to collect a bladder from a cow I had hunted while in the area. The walk home was long and arduous. It was made longer still because I only ever traveled during the day, while the predators were sleeping.
When I finally arrived home after so long away, I was very sorely missing my donkey companion. I will have to tame another horse/donkey before too long. The upside is that those sheep had finally grown their wool while I was gone! I also missed the Olive harvest this year, which is HUGELY disappointing as olive oil is widely useful, and something I had been looking forward too.
That's gonna be all for this Terrafirmacraft update, it was shorter but this was a lot of playtime lol. My plan for the next bit of progression is to get into making brass, for brass mechanisms and decorations. Brass mechanisms are going to open up a lot of stuff with Create, and some other things like horse carts. It's all very exciting, and we'll pick back up on it next time!
Last edited by SkieSquiggles on Sun May 04, 2025 1:10 pm, edited 1 time in total.
Signature Under Construction
(until I think of a better one)-
SkieSquiggles
- They/It
- Posts: 1754
- Joined: Sat Nov 19, 2022 7:29 pm
- Contact:
Re: Squiggles' Terrafirmacraft Playthrough!
Bonus Post: Donkey Memorial

Signature Under Construction
(until I think of a better one)